Yuoki Industries is a Factorio mod that adds a large amount of new content: power generation, trade, unicomp, weapons, and more. It isn’t as streamlined as other mods: no research tree is provided so every recipe is overwhelmingly available from the start of the game, and it changes nothing in the core game recipes so there is no natural guide to exploring the mod. You need to find your own fun.
I really enjoyed it though: the recipes are interesting, the art if fantastic, and the broken english is hilarious. There are other more approachable modsof similar scope, but if you’re comfortable dealing with a few rough edges it’s well worth your time.
I also used the Yuoki Tech Tree mod to hide recipes behind research, to make it a bit easier to figure out where to get started. This did create a bug in the end game with some late game recipes being completely unavailable: I recommend removing the mod once you’ve researched everything.
Base Tour
One of the bits of fun I embarked was to design a belts-only 0.5 rocket per minute factory, using Unicomp. Unicomp is a Yuoki addition: all resources can be both converted to and synthesized from Unicomp. This makes mine and train logistics much easier.
Why 0.5? I calculated out the ratios for a number of different targets, and this one felt like a “nice” size. Not too big, not too small.
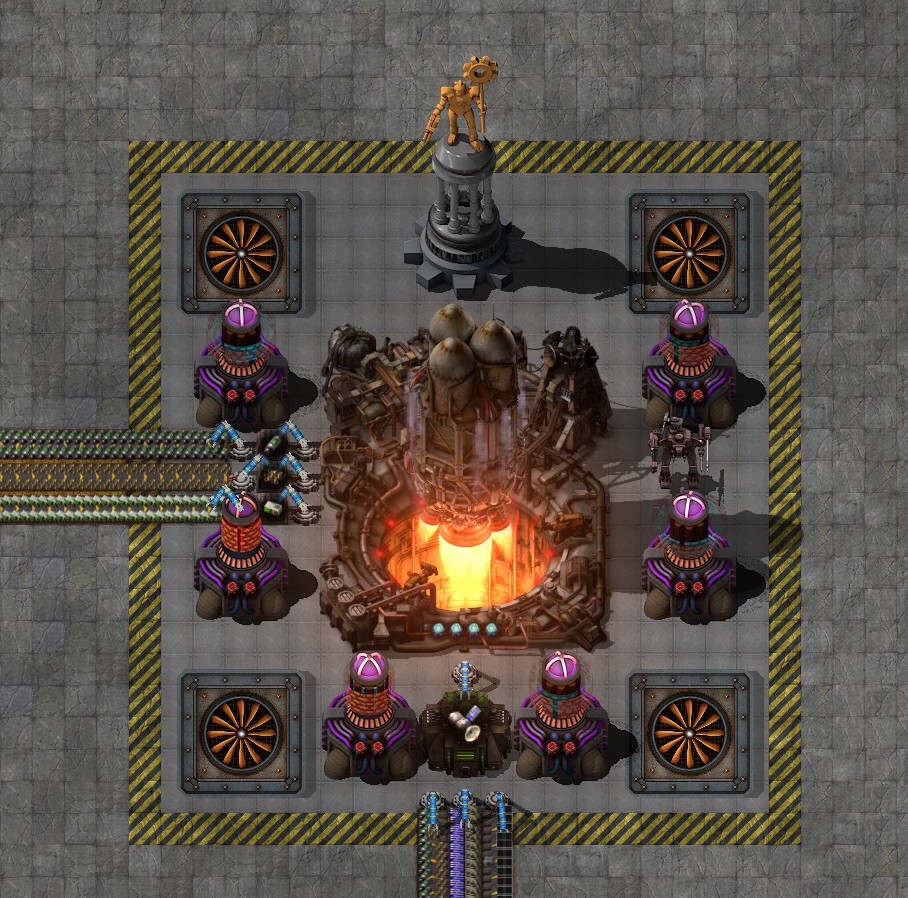
Starting at the end, behold this glorious rocket platform. Cooling fans, smoothed concrete, superfluous beacons, and a statue to our glorious leader, AKA me. All completely decorative.
The silo has four Science, Baby! modules in it, which give +30% productivity each. Using them here and in each intermediary that allowed them was key to keeping the factory to the size that it is.

This is where it all begins. The miner ratios, using big Yuoki miners, are basically accurate to fill a blue belt with ore, which is then compacted down 20:1 into Unicomp.

The Unicomp is unloaded directly into liquifiers that pack it down another 20:1 into Liquid Unicomp. Both of these steps are somewhat unnecessary though I decided it would be fun. The beacons too are unnecessary, but they do mean a train unloads in about a second or two. If you haven’t seen these beacons before, they transmit at 65% and the red modules are +32.5% speed but reduce power usage.
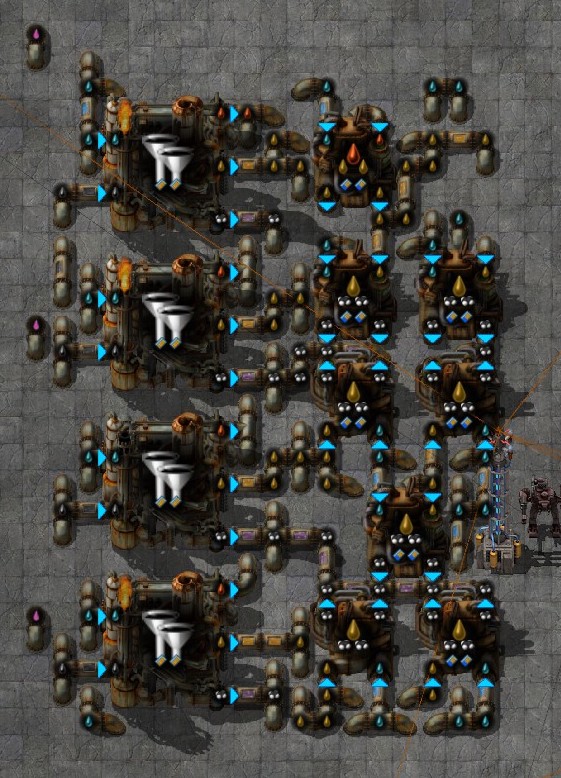
Ore to pellets. Note the wiggled belts so that everything could be loaded into the washers. Waste water is processed on the left back into rich dust (needed in next step) and Unicomp which is fed back to the beginning.
The belting is a little janky because I initially made a mistake with my ratios and had to figure out a way to get extra blue belts of ore to the later washers.
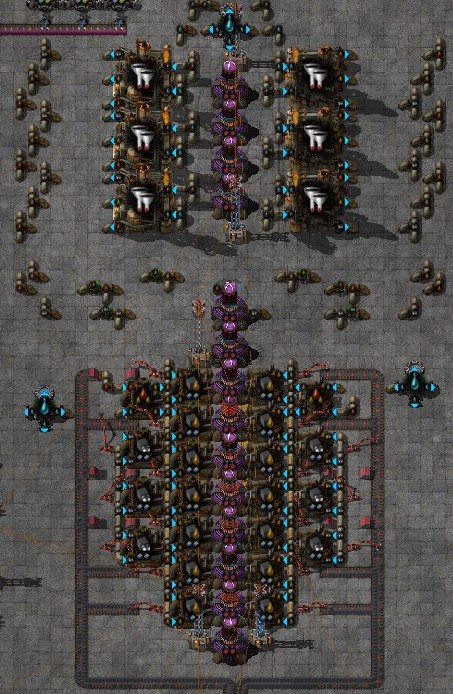
Pellets to plate and steel. As above, figuring out how to belt everything was fun. Slag is packed down to Unicomp and fed back into the beginning, much like waste water.
The rest of the plate production, plus plastic (direct from Unicomp) and sulfuric acid.
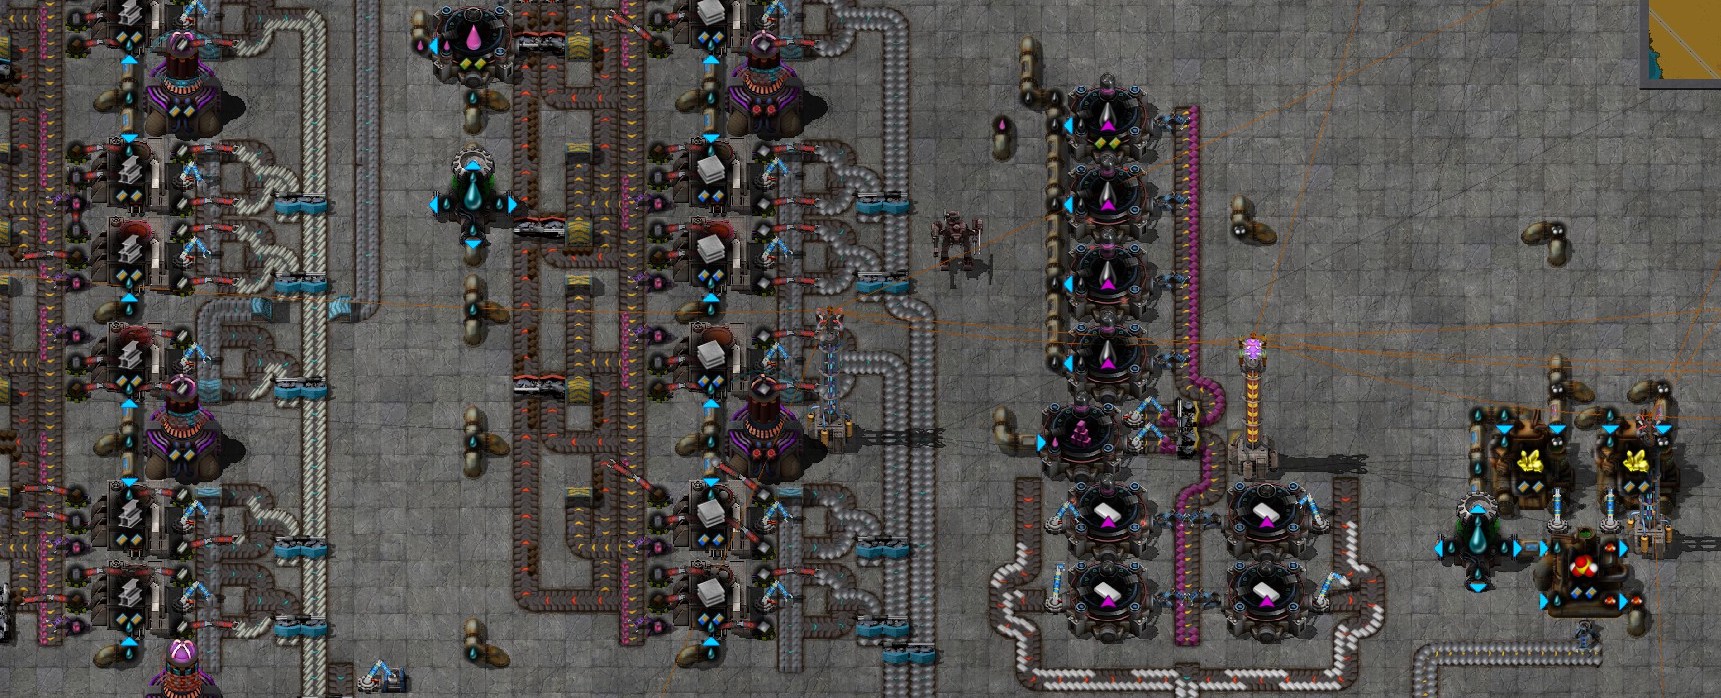
Oil production for sulfuric acid, done separately from oil production for rocket fuel (next graphic) because I felt like it.
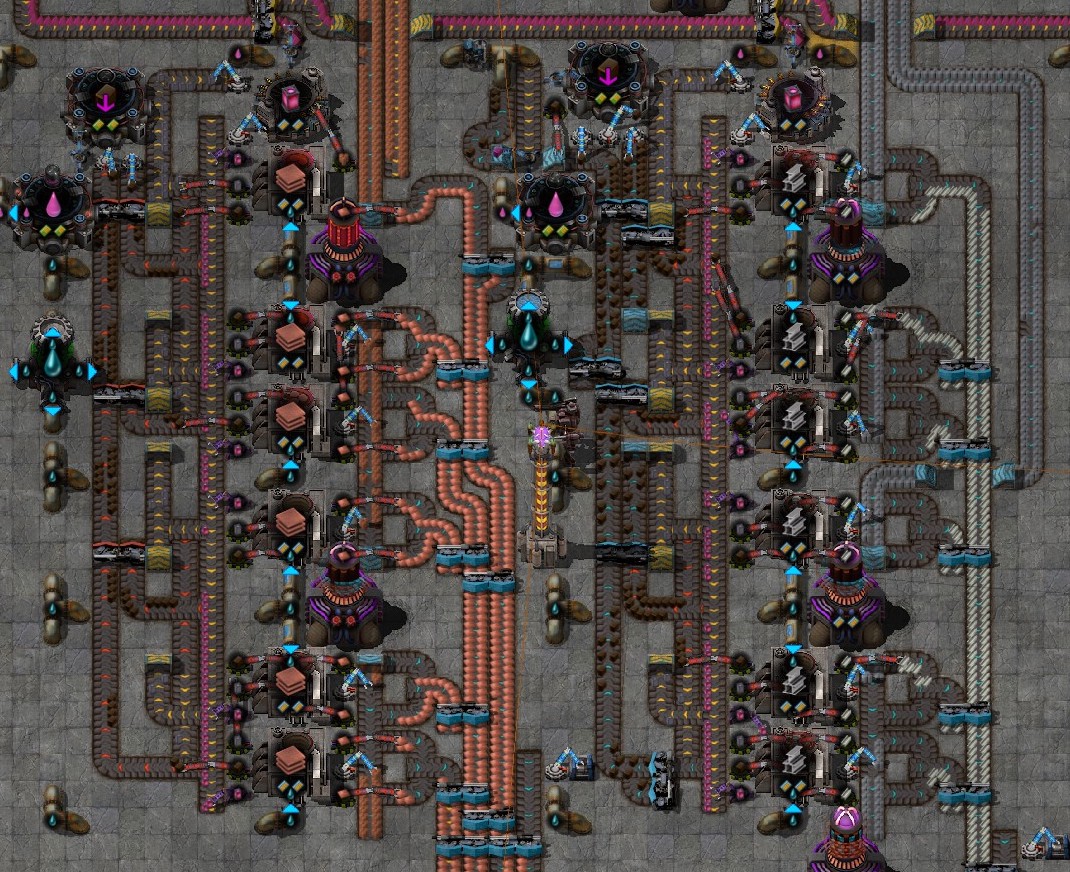
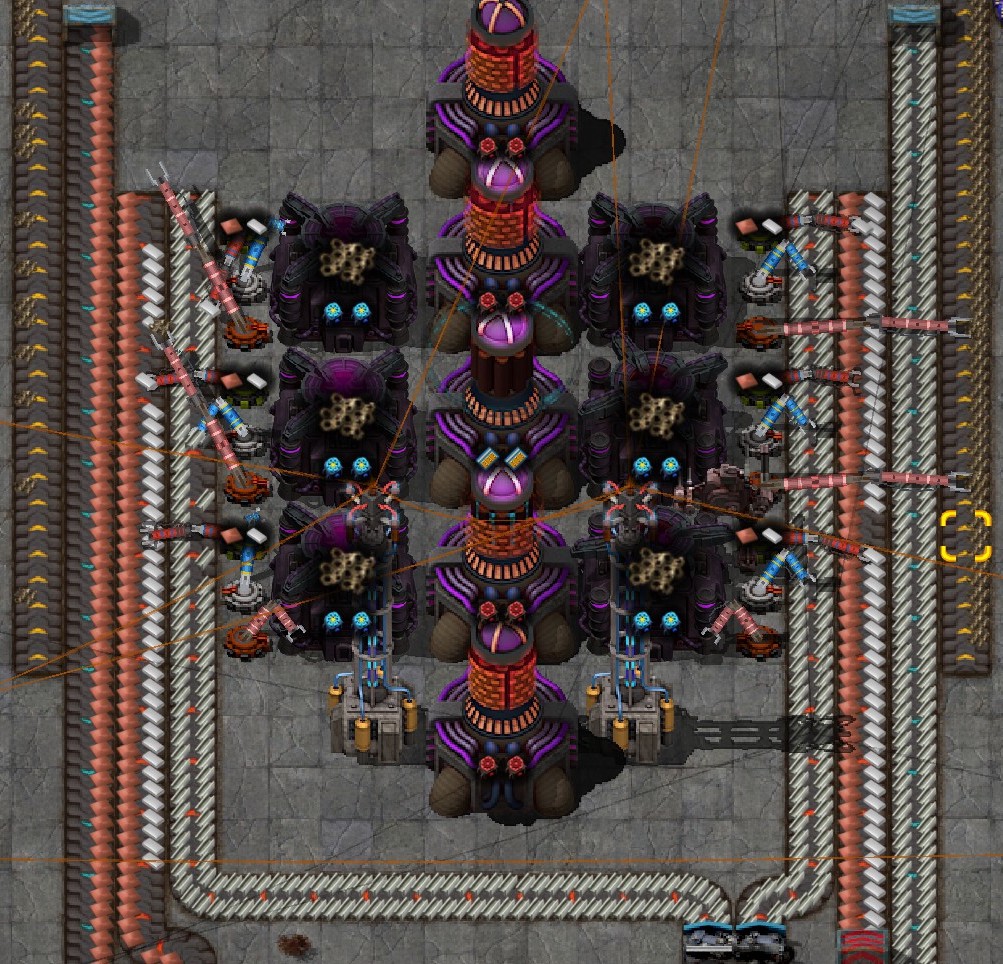
Rocket fuel with dedicated oil production. I like the pattern of having beacons running down the centre.
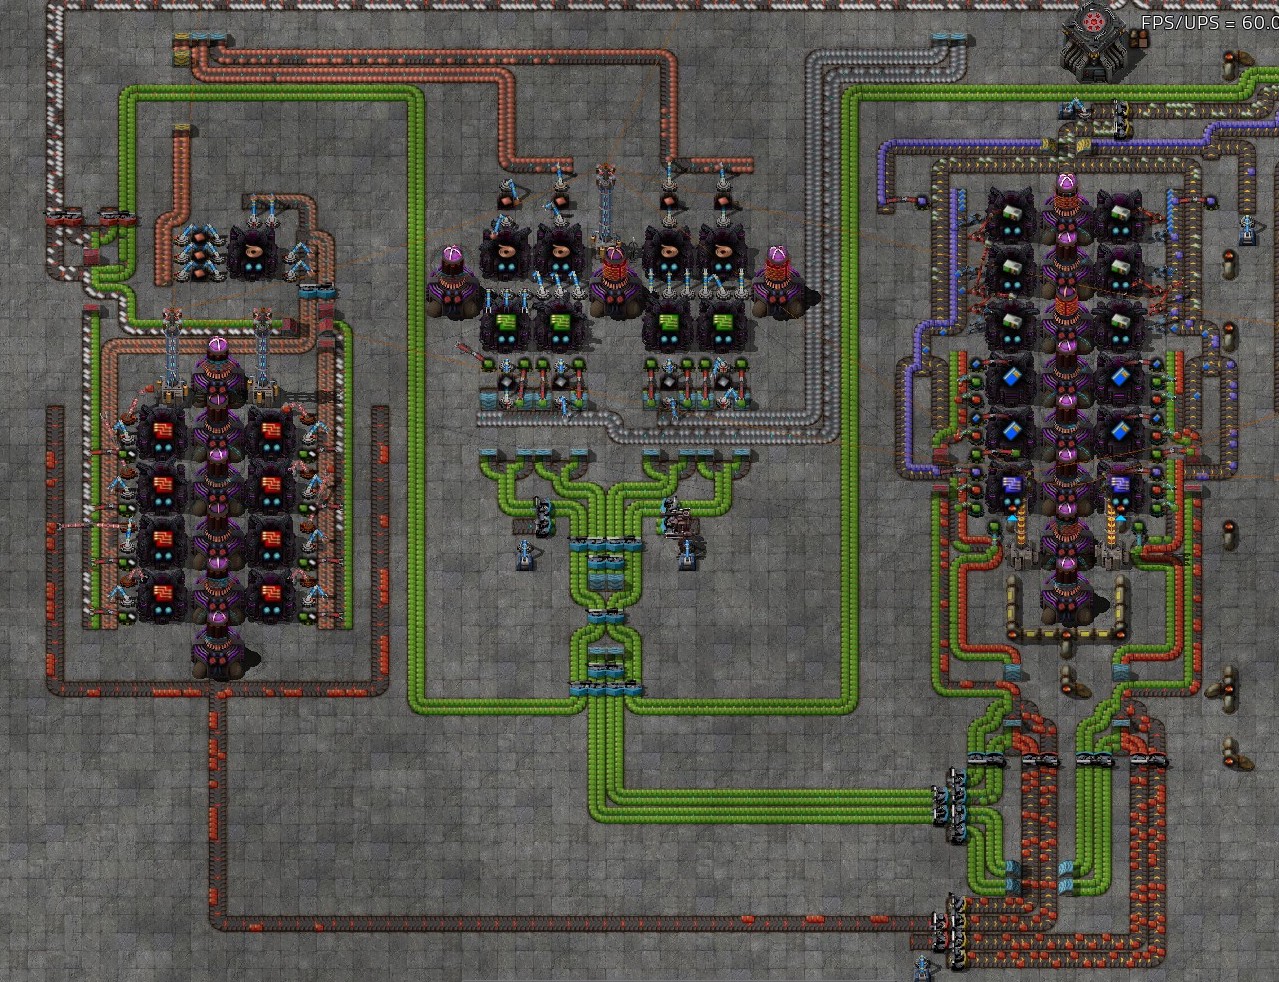
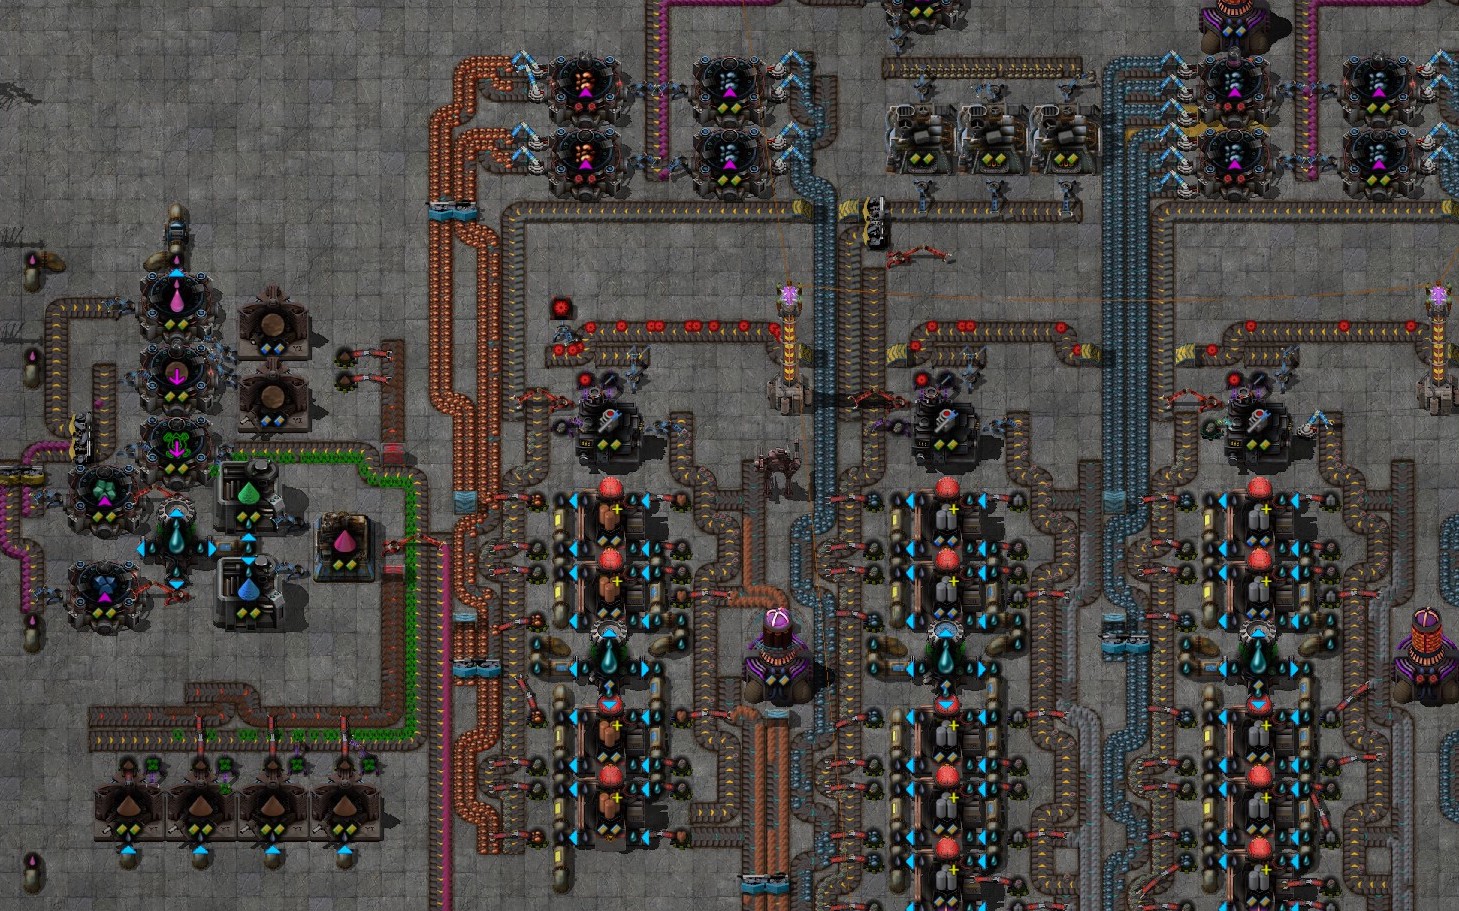
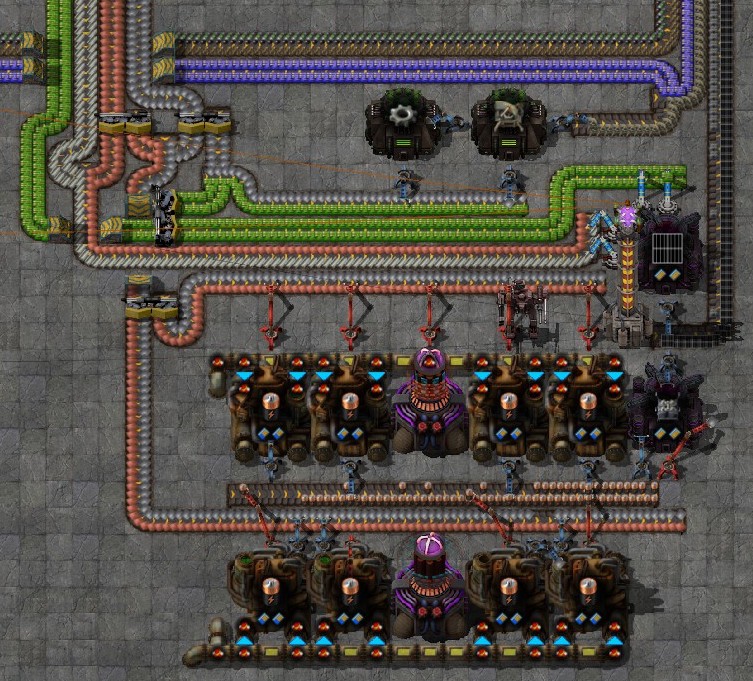
Circuits and Rocket Control Units. Note the chests feeding green circuits. They are a needed buffer — the inserters will pause picking off the belt once they’ve oversupplied the assembler, but the assembler is so fast that they really need to be going all the time to keep it occupied. This is a thing I didn’t realise would be a problem until I built it!
I also quite like the green/red combining at the lower right.
Low Density Structures are pretty straight-forward.
And then satellite production to finish it off!
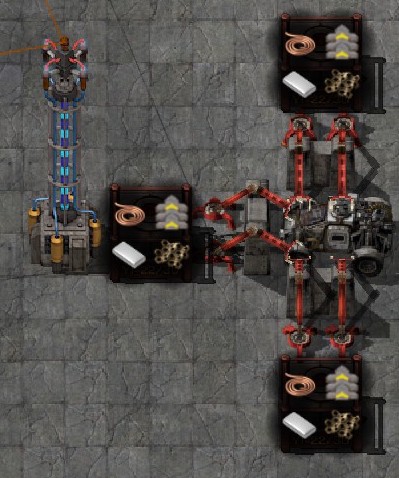

The making of the rocket has no bots, but I do have a neat setup for building. When an area needs to be destroyed and rebuilt, particularly when it contains rocket parts, it can be a real pain to clear all the belts.
I park a car at the end of the belt, place down a fast inserter, and cut the belts on either side of the section I’m changing so that the belt empties into the car. Bringing the car back to this unloading station, it unloads into passive chests.
Each production line has a requester chest near the beginning with a circuit to block the belt if the chest is non-empty. This way, any extra materials that were picked up off the belt are fed back in to the factory.

I used Foreman to get my ratios and belts right, but it required some significant patching to work with this complicated a setup (fixed crashes, calculations, enabled productivity bonuses, pass through nodes, etc). Foreman doesn’t really exist anymore, and there are newer mods that do a better job, but if you’re curious in the math and approach I made a video about it.